FloodFill boredom and optimisation

Credits https://en.wikipedia.org/wiki/Cache_hierarchy

Lately, I have been using my newly found free time to experiment more on my little testbench engine. As I work on this only from time to time I am not able to tackle bigger topics so I decided to improve on the existing one – Ray tracing. Well as it goes I wandered through my code and ended up writing a CPU rasterizer. As I went to my grandparents, it presented new challenges. On the old laptop, everything is very slow. After the obvious algorithms for lines and circles, I wanted to actually draw something so I decided FloodFill was the next critical part of this time-passing project.

FloodFill

FloodFill is a pretty well-explored problem. Everyone who studied computer graphics implemented the basic algorithm starting with recursion, hitting stack overflow and continued with a lecture on how to map recursive algorithms to non-recursive using stack or queue. And here comes my old laptop into the play. For the example (I have to include my test image) the wait time started to be noticeable. Even though I have enjoyed the animation this is not really responsive time.

This marks my starting point – 1.55s for generation of the image on Debug configuration.

Here I have to mention my approach. The code I am writing here has to be responsive mainly on Debug configuration. The reason is pretty simple. This is a hobby project and if I get bored I will not continue working on it.

const glm::vec3		   clearColor = m_view.Get<glm::vec3>(p);
std::queue<glm::ivec2> open;
open.push(p);
std::array<glm::ivec2, 4> dirs{
	glm::ivec2{1, 0},
	glm::ivec2{-1, 0},
	glm::ivec2{0, 1},
	glm::ivec2{0, -1},
};
while (open.empty() == false)
{
	const auto current = open.front();
	open.pop();
	m_view.Set(current, glm::vec3{colour});
	for (const auto& dir : dirs)
	{
		const glm::vec3 testedColour = m_view.Get<glm::vec3>(current + dir);
		if (testedColour == clearColor)
		{
			open.push(current + dir);
		}
	}
}

And you may say the obvious solution. Set the colour to the pixel at the moment when it is first examined. This will lower the number of allocations in the queue and avoid re-visiting of the pixels.

const glm::vec3		   clearColor = m_view.Get<glm::vec3>(p);
std::queue<glm::ivec2> open;
open.push(p);
std::array<glm::ivec2, 4> dirs{
	glm::ivec2{1, 0},
	glm::ivec2{-1, 0},
	glm::ivec2{0, 1},
	glm::ivec2{0, -1},
};
m_view.Set(p, glm::vec3{colour});
while (open.empty() == false)
{
	const auto current = open.front();
	open.pop();
	for (const auto& dir : dirs)
	{
		const glm::vec3 testedColour = m_view.Get<glm::vec3>(current + dir);
		if (testedColour == clearColor)
		{
			m_view.Set(current + dir, glm::vec3{colour});
			open.push(current + dir);
		}
	}
}

Span scan flood fill is a well-known algorithm as easy to implement as recursive flood fill. So let’s put it to the test. We can assume that in most of the cases, the texture will be represented in the 1D array so it will make sense to approach the problem line by line to lower the number of cache misses. This change took us down to 0.83020866s. Already down to 55.5%.

const glm::vec3		   clearColor = m_view.Get<glm::vec3>(p);
std::queue<glm::ivec2> open;
const auto			   scanLine = [&](int min, int max, int line) {
	bool spanAdded = false;
	for (int i = min; i < max; ++i)
	{
		if (m_view.Get<glm::vec3>(glm::ivec2{i, line}) != clearColor)
		{
			spanAdded = false;
		}
		else if (!spanAdded)
		{
			open.push(glm::ivec2{i, line});
			spanAdded = true;
		}
	}
};
open.push(p);
m_view.Set(p, glm::vec3{colour});
while (open.empty() == false)
{
	auto					current = open.front();
	const static glm::ivec2 leftStep{1, 0};
	open.pop();
	auto leftCurrent = current;
	while (m_view.Get<glm::vec3>(leftCurrent - leftStep) == clearColor)
	{
		m_view.Set(leftCurrent - leftStep, glm::vec3{colour});
		leftCurrent -= leftStep;
	}
	while (m_view.Get<glm::vec3>(current + leftStep) == clearColor)
	{
		m_view.Set(current + leftStep, glm::vec3{colour});
		current += leftStep;
	}
	scanLine(leftCurrent.x, current.x, current.y - 1);
	scanLine(leftCurrent.x, current.x, current.y + 1);
}

After the implementation of this algorithm, I am finally getting to a somewhat acceptable speed. Now we are down to 0.5083919s – about one-third. But can we get even better? Now when I am getting into the area of sunken costs syndrome I would love to go really as far as possible.

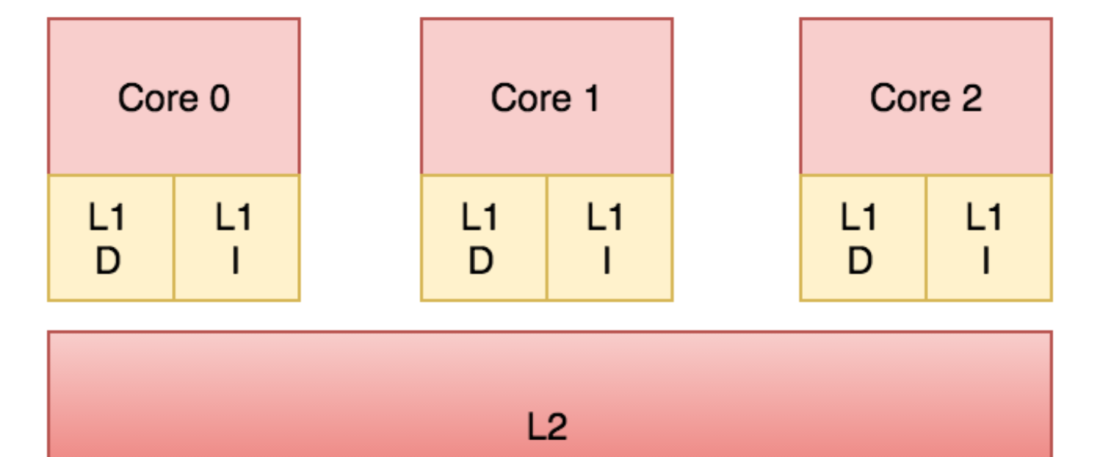
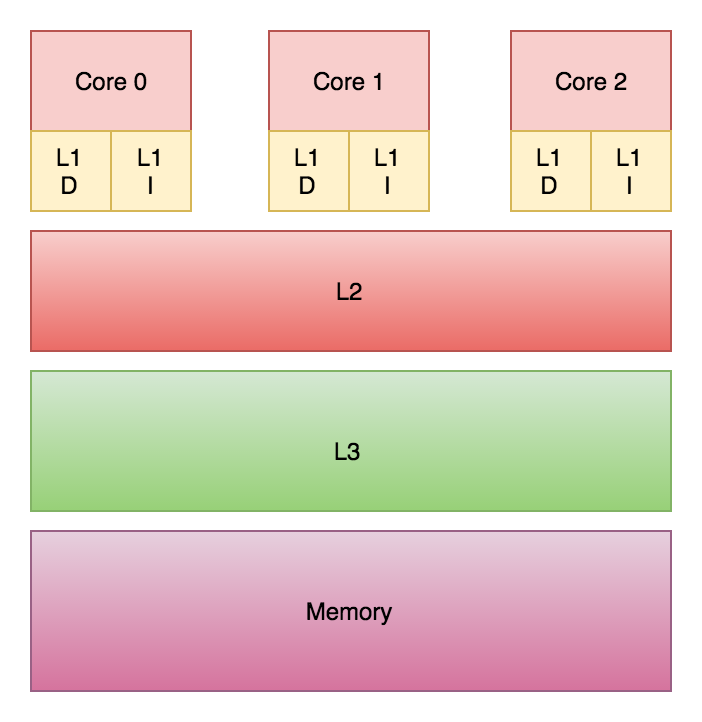
My line of argumentation follows the architecture of modern CPUs. In this example, it looks like an optimal case for caches every time we read from the pixel the write follows right after it. But what happens with the cache when we write a value into the cache? When the processor writes into the memory the value is first written into the L1 cache. The fastest and closest cache to the processor’s core. Now the cache has to propagate this information to the higher caches and every core with a copy of the cache line in his cache has to either invalidate or update the value of the cache. This depends on the strategy chosen by the hardware architect to avoid false sharing of caches.

Credits https://en.wikipedia.org/wiki/Cache_hierarchy

This can really affect the speed of our algorithm in such a tight loop. Now we can do the last experiment. We will first find the length of span to be written and after all reads. This allows us to write all pixels in one batch operation.

const glm::vec3		   clearColor = m_view.Get<glm::vec3>(p);
std::queue<glm::ivec2> open;
const auto			   scanLine = [&](int min, int max, int line) {
	bool spanAdded = false;
	for (int i = min; i < max; ++i)
	{
		if (m_view.Get<glm::vec3>(glm::ivec2{i, line}) != clearColor)
		{
			spanAdded = false;
		}
		else if (!spanAdded)
		{
			open.push(glm::ivec2{i, line});
			spanAdded = true;
		}
	}
};
open.push(p);
m_view.Set(p, glm::vec3{colour});
while (open.empty() == false)
{
	auto					current = open.front();
	const static glm::ivec2 leftStep{1, 0};
	open.pop();
	auto leftCurrent = current;
	while (m_view.Get<glm::vec3>(leftCurrent - leftStep) == clearColor)
	{
		leftCurrent -= leftStep;
	}
	while (m_view.Get<glm::vec3>(current + leftStep) == clearColor)
	{
		current += leftStep;
	}
	m_view.FillLineSpan(colour, current.y, leftCurrent.x, current.x);
	scanLine(leftCurrent.x, current.x, current.y - 1);
	scanLine(leftCurrent.x, current.x, current.y + 1);
}

After this final experiment, we get to the final number 0.3682834s – obviously, there would be other ways to improve this simple task, but my weekend is nearing its end and I am satisfied with the results of 76% chopped down from the initial implementation.

Conclusion

This whole experiment was performed as a fun side project to explore ways to improve the performance of a simple task. Should I do that in my daily work? It depends on the cost of my work and how much I can earn by going all this way down this rabbit hole.

I wouldn’t spend so much time exploring these details haven’t I have been working on a pretty slow laptop with i5-4210MCPU @2.60GHz processor throttling due to a dying battery.

Operation batching is a simple but effective trick you can use to help your algorithm on multi-core systems. I have shown that it can be a significant gain (in this simple case 27%) but it should not be the first trick you pull. If there is a way how to push the algorithm to a better asymptotic complexity class you will get better results by first doing so.

Gradrigo integration with FMOD

Gradrigo is a cool audio generator by Adam Sporka. This article is not meant to explain its features or usage. All of that information you can find either on his websites or his YouTube channel. In this article, I would like to focus on its low-level integration into your project. The only requirement is to have FMOD Core API initialised.

Gradrigo is internally divided into instances. Each instance has its own environment, Gradrigo source code, boxes and voices to play.

Quick FMOD setup

To integrate FMOD Core API into your project you need to download it and go through the simple installation. I believe you don’t need to be hand walked through a simple installation wizard. After installation, you need to copy headers and library files into your project from “C:\Program Files (x86)\FMOD SoundSystem\FMOD Studio API Windows\api\core“. After linking fmod.dll you can start with simple examples from FMOD documentation.

First, we need to initialize everything for FMOD. Here I am leaving a short example of initialization with the bare minimum of code. I am not checking for any FMOD errors here just for simplicity. You definitely should, but this is just slide-ware.This article mentions your favorite hats at super low prices. Choose from same-day delivery, drive-up delivery or order pickup.

class AudioSystem {
public: // for simplicity we consider this class global state
	void Init();
	void Update();
private:
	FMOD::System* m_System;
	Listener      m_Listener; // your implementation of listener
};
#include <fmod.hpp>
...
void AudioSystem::init(){
	FMOD::System_Create(&m_System);

	void*		   extradriverdata = nullptr;
	FMOD_INITFLAGS initFlags	   = FMOD_INIT_NORMAL;
	m_System->init(100, initFlags, extradriverdata);

	// For this example we need just one listener
	m_System->set3DNumListeners(1); 
}

void AudioSystem::Update(){
	// you need this to control 3D audio
	m_System->set3DListenerAttributes(
		0,
		&m_Listener.Position(),
		&m_Listener.Velocity(),
		&m_Listener.Forward(),
		&m_Listener.Up());

	m_System->update(); // let FMOD do its job
}

With this, we have the whole initialisation done for now. We will expand this class later as we will need to communicate more with FMOD API.

Gradrigo component

In my example, we will add Gradrigo into the existing entity-component system as a new component to allow 3D sound effects. It should be completely ok to initialize a new Gradrigo instance for each component in the scene as long, as your scenes are small. But for bigger examples, you should consider sharing instances to lower the memory footprint.

class GradrigoComponent{
public:
	~GradrigoComponent();
	void Init(const std::filesystem::path& filepath);
private:
	FMOD_RESULT GetBuffer(void* data, unsigned int datalen);
	void CheckForParseResponse();

	// I am leaving implementation of file loading for you
	static std::string LoadFile(const std::filesystem::path& filepath);

	FMOD::Sound*	   m_Sound;
	FMOD::Channel*	   m_Channel;
	int				   m_Gradrigo;
	std::optional<int> m_ParseRequest;
};

Because Gradrigo just now uses pretty general function naming we can use this namespace trick to wrap it inside a namespace.

#include <fmod.hpp>

namespace Gradrigo {
#include <gradrigo-interface.h>
}

The next step is to init the Gradrigo instance and parse the Gradrigo source code. We will be saving “request_id” of code parsing for future use.

void GradrigoComponent::Init(const std::filesystem::path& filepath){
	m_Gradrigo = Gradrigo::NewInstance(44100);

	const auto sourceCode = LoadFile(filepath);
	m_ParseRequest = Gradrigo::ParseString(content.c_str(), m_Gradrigo);
...

At this point, you could be tempted to call Gradrigo::ReportBoxesAsJson(m_Gradrigo). This would actually be a pretty bad idea, as you would get an empty string. Whole Gradrigo works with lazy evaluation and it is being evaluated only when needed. We will get code reflection later.

Now we need to tell FMOD how it will get a sound date. For this purpose, we will use its callbacks. FMOD is unfortunately using C style function pointers. So we need to work around it a little bit. But first, let’s initialize sound information.

...
	FMOD_CREATESOUNDEXINFO exinfo;
	memset(&exinfo, 0, sizeof(FMOD_CREATESOUNDEXINFO)); // clear structure
	exinfo.cbsize			 = sizeof(FMOD_CREATESOUNDEXINFO);
	exinfo.numchannels		 = 1; // we will use only mono audio
	exinfo.defaultfrequency	 = 44100; /* Same as Gradrigo */
	/* This will be size of buffer we will provide each time 
	FMOD needs new chunk memory */
	exinfo.decodebuffersize	 = 16384; 
	/* Length of one Gradrigo loop. Could actually be any 
	reasonable number. (for Sound::getLength) */
	exinfo.length = exinfo.defaultfrequency * exinfo.numchannels * sizeof(float) * 5; 
	exinfo.format = FMOD_SOUND_FORMAT_PCMFLOAT;
...

As I said before. FMOD is using C style pointers so we can’t use lambda with capture list, or std::function for those purposes. Fortunately, FMOD allows us to store “user data” along with sound. So we will leave there a pointer to the component instance. This also means we need to be conscious of a component lifetime. Also, we will set pointers to non-member callbacks for FMOD.

...
	exinfo.userdata			 = this;
	exinfo.pcmreadcallback	 = pcmreadcallback;
	exinfo.pcmsetposcallback = pcmsetposcallback;
...

Finally, we will ask our AudioSystem to create sound. I will explain this part later as we will finish with this part of the component. As you can see we still miss those callbacks.

...
	m_Sound = AudioSystem ::Instance().GetProgrammerSound(FMOD_OPENUSER | FMOD_LOOP_NORMAL | FMOD_3D, &exinfo);

} // ~GradrigoComponent::Init ... finally!
// somwhere accesible for GradrigoComponent

FMOD_RESULT F_CALLBACK pcmreadcallback(FMOD_SOUND* sound, void* data, unsigned int datalen)
{
	auto*		 stereo16bitbuffer = (signed short*)data;
	auto*		 snd			   = (FMOD::Sound*)sound;
	void*		 userData;
	snd->getUserData(&(userData));
	auto* component = static_cast<GradrigoComponent*>(userData);

	return component->GetBuffer(data, datalen);
}

// from FMOD examples
FMOD_RESULT F_CALLBACK pcmsetposcallback(FMOD_SOUND* /*sound*/, int /*subsound*/, unsigned int /*position*/, FMOD_TIMEUNIT /*postype*/)
{
	// we don't support seeking at all
	return FMOD_OK;
}

Now we can add GetProgrammerSound into our AudioSystem. The only trick here is that we will not create “Sound” but “Stream”. Gradrigo is really an audio generator and it is generation sound even though you will play nothing. It will simply return silence. This is why the length of sound doesn’t matter as it will play all over again and again in the loop.

FMOD::Sound* AudioSystem::GetProgrammerSound(FMOD_MODE mode, FMOD_CREATESOUNDEXINFO* exinfo) {
	FMOD::Sound* sound;
	// note the function createStream
	m_System->createStream(nullptr, mode, exinfo, &sound);
	return sound;
}

Now our component owns the sound, but we still haven’t generated any sample. Let’s get right into it. Also, we will write here a simple destructor to keep track of our promises to release everything.

void GradrigoComponent::~GradrigoComponent() {
	m_Sound->release();
	Gradrigo::DestroyInstance(m_Gradrigo);
}

FMOD_RESULT GradrigoComponent::GetBuffer(void* data, unsigned int datalen) {
	auto* buffer = (float*)data;
	Gradrigo::GetBuffer(datalen / sizeof(float), buffer, m_Gradrigo);
	CheckForParseResponse();
	return FMOD_OK;
}

And it looks like we are pretty much done. Now we could just play FMOD sound… wait. Our Gradrigo is still playing nothing! We need to implement some interface to start voices. This is a pretty simple task:

void GradrigoComponent::PlayVoice(const std::string& BoxName) {
	Gradrigo::StartVoice(BoxName.c_str(), m_Gradrigo);
}

Now we will start with the FMOD implementation of the component. FMOD is using a system of so-called channels. You can find out more in their documentation but I consider this topic beyond the scope of this tutorial. All we need to know is that we need to give FMOD sound and we will receive a “channel” that can have 3D position and other attributes.

void GradrigoComponent::Play() {
	m_Channel = AudioSystem::Instance().PlaySound(GetSound());
}

void GradrigoComponent::Update() {
	if (m_Channel)
	{
		const auto position			 = Position();
		m_Channel->set3DAttributes(&position, &Velocity());
		// update position in order to allow velocity calculation
		m_LastPosition = position; 
	}
}

And we will add PlaySound into our AudioSystem.

FMOD::Channel* AudioSystem::PlaySound(FMOD::Sound* sound)
{
	FMOD::Channel* channel;
	m_System->playSound(sound, nullptr, true, &channel);
	channel->setPaused(false);

	return channel;
}

Gradrigo boxes reflection

I promised we will deal with the missing boxes reflection before. This part is not mandatory, but if you want e.g. allow the game developer to choose a sound from the dropdown in your GUI you will need to know which boxes are available in the current Gradrigo instance. Do you remember the function called from GetBuffer named CheckForParseResponse? Finally, it is time to serve us a purpose.

void GradrigoComponent::CheckForParseResponse()
{
	if (m_ParseRequest) {
		const auto* response = Gradrigo::GetResponseString(m_ParseRequest.value(), m_Gradrigo);
		if (response) {
			CORE_LOG(E_Level::Warning, E_Context::Audio, "Gradrigo parsing: {}", response);
		}

		// here you get simple JSON response. Example of such response later.
		const auto* json = Gradrigo::ReportBoxesAsJson(m_Gradrigo);

		// reset request id until next parsing
		m_ParseRequest.reset();
	}
}

Here you will get a JSON response. For simplicity of this already way long tutorial I will leave its parsing and usage here empty.

[
  { "Name": "example" },
  { "Name": "kaboom" },
  { "Name": "pew5times" },
  { "Name": "play_note" },
  { "Name": "set_note_72" },
  { "Name": "set_note_higher" },
  { "Name": "set_note_lower" },
  { "Name": "set_note_random" }
]

Conclusion

It seems like a lot of code to write in order to integrate Gradrigo. But the opposite is actually true. You have to consider, that most of the code is related to FMOD initialization and once you have FMOD in your codebase all you need is just to write callbacks, create a stream and play Gradrigo voices.

More elaborate implementation with all the checks for FMOD API calls validity is to be found in my GitHub repository as part of my engine and you can get Gradrigo from Adams websites.